> ## Documentation Index
> Fetch the complete documentation index at: https://dify-6c0370d8-docs-agent-app-service-api.mintlify.site/llms.txt
> Use this file to discover all available pages before exploring further.

# 数据源授权

> 本文档由 AI 自动翻译。如有任何不准确之处，请参考 [英文原版](/en/cloud/use-dify/knowledge/knowledge-pipeline/authorize-data-source)。

Dify 支持多种外部数据源的连接，为了确保数据安全和访问控制，不同的数据源需要进行相应的授权配置。根据数据源的特性，Dify 提供两种主要的授权方式：**API Key** 和 **OAuth**，以确保你能够安全地访问和导入所需的数据。

## 数据源授权界面入口

在 Dify 中，你可以通过以下两种方式进入数据源授权配置界面：

### 方式一：通过知识流水线编排界面

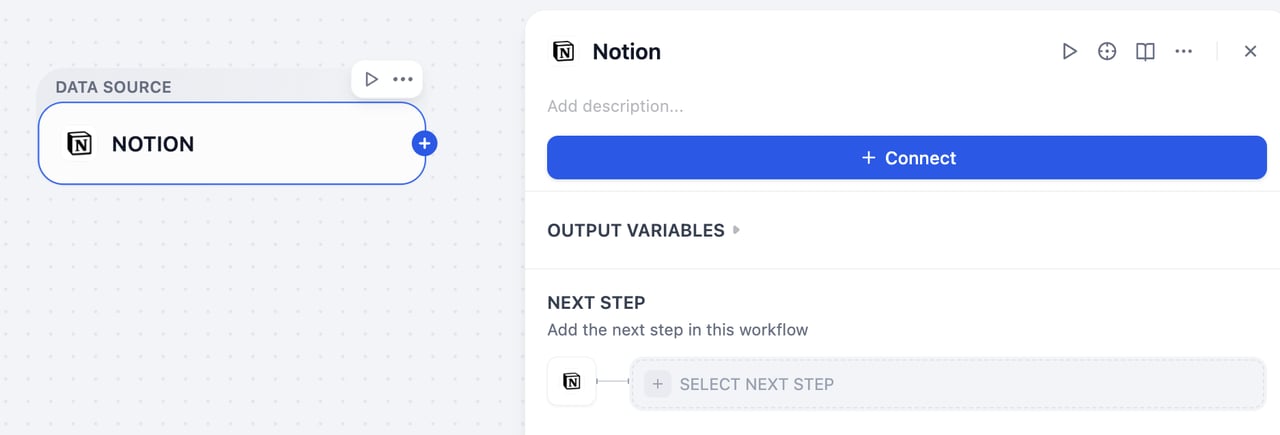
进入知识流水线编排界面，添加需要的数据源。选中数据源节点，在右侧面板中，点击 **绑定**。

<Frame>
  <img src="https://mintcdn.com/dify-6c0370d8-docs-agent-app-service-api/FlfPVUsZ5mgKH0FL/images/use-dify/knowledge/authorize-data-01.png?fit=max&auto=format&n=FlfPVUsZ5mgKH0FL&q=85&s=88b6547633a94e3609dfbef17079812a" alt="流水线授权界面" width="1280" height="435" data-path="images/use-dify/knowledge/authorize-data-01.png" />
</Frame>

### 方式二：设置界面

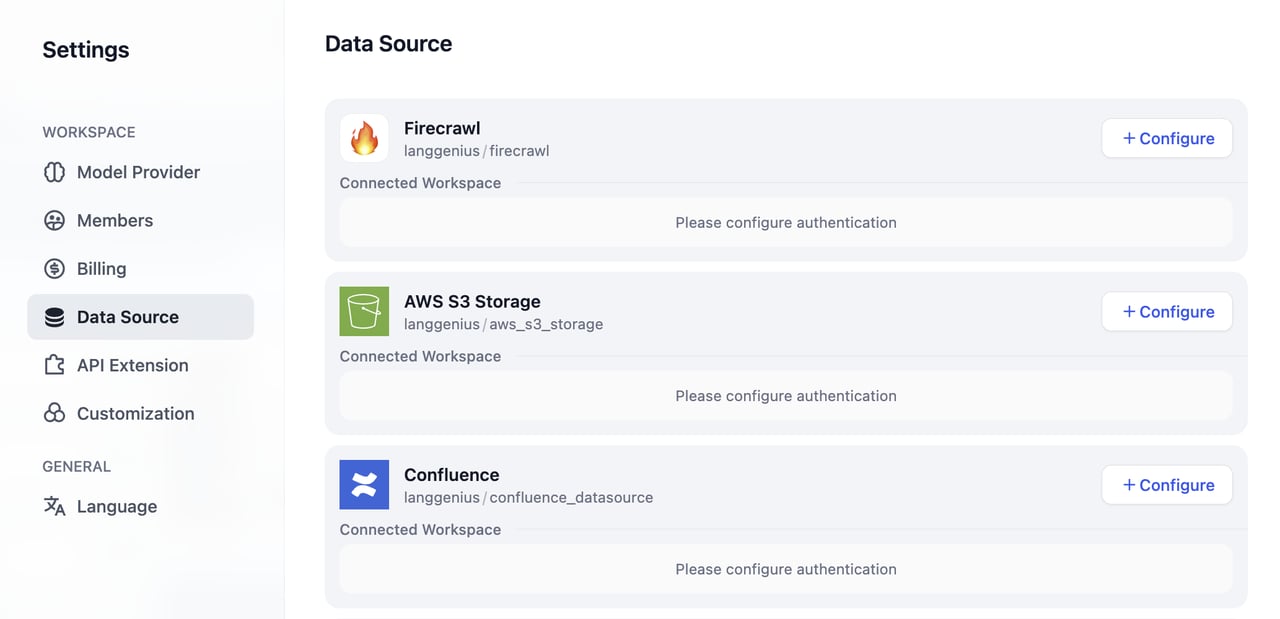
点击右上角头像，选择 **设置**，点击 **数据来源**。进入数据来源页面后，选择需要授权的数据源，点击 **配置**。

<Frame>
  <img src="https://mintcdn.com/dify-6c0370d8-docs-agent-app-service-api/FlfPVUsZ5mgKH0FL/images/use-dify/knowledge/authorize-data-02.png?fit=max&auto=format&n=FlfPVUsZ5mgKH0FL&q=85&s=3932bef1a0ebc7fdfd3aac9e852830ac" alt="设置授权界面" width="1280" height="619" data-path="images/use-dify/knowledge/authorize-data-02.png" />
</Frame>

## 支持数据源及授权方式

| 数据源          | API Key | OAuth |
| ------------ | ------- | ----- |
| Notion       | ✅       | ✅     |
| Jina Reader  | ✅       |       |
| Firecrawl    | ✅       |       |
| Google Drive |         | ✅     |
| Dropbox      | ✅       | ✅     |
| OneDrive     |         | ✅     |

## 授权方式和流程

### API Key 授权

API Key 授权是一种基于密钥的身份验证方式，适用于企业级服务和开发者工具。用户需要在对应的服务提供商处生成 API Key，然后在 Dify 中进行配置。

#### 授权流程

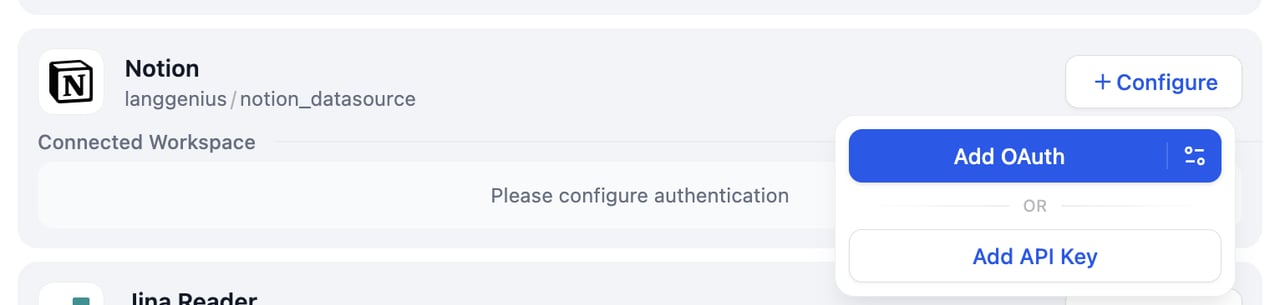
1. 在数据源配置界面，选择对应的数据源，点击右侧的 **配置**，选择 **添加 API Key**。

   <Frame>
     <img src="https://mintcdn.com/dify-6c0370d8-docs-agent-app-service-api/FlfPVUsZ5mgKH0FL/images/use-dify/knowledge/authorize-data-03.png?fit=max&auto=format&n=FlfPVUsZ5mgKH0FL&q=85&s=26f2e4e69f631e325143ec2ff5afd6d8" alt="添加 API Key" width="1381" height="256" data-path="images/use-dify/knowledge/authorize-data-03.png" />
   </Frame>

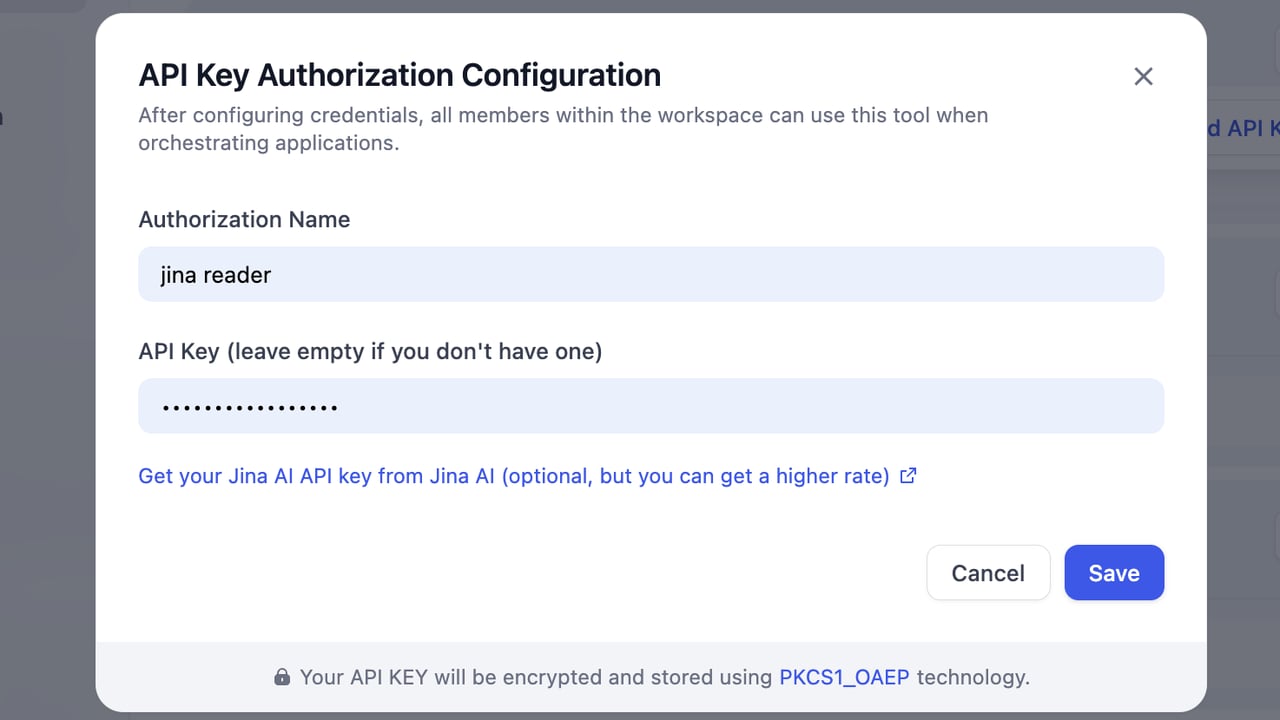
2. 在弹出的配置面板中，填写对应信息。完成后，点击 **保存** 完成授权。

   <Frame>
     <img src="https://mintcdn.com/dify-6c0370d8-docs-agent-app-service-api/FlfPVUsZ5mgKH0FL/images/use-dify/knowledge/authorize-data-04.png?fit=max&auto=format&n=FlfPVUsZ5mgKH0FL&q=85&s=2fb68849c6794bdaaadd41330c0b9de1" alt="API Key 配置" width="1280" height="720" data-path="images/use-dify/knowledge/authorize-data-04.png" />
   </Frame>

API 密钥将被安全加密储存，配置成功后会显示 **Connected** 状态，你可以在知识流水线中使用该数据源。

<Frame>
  <img src="https://mintcdn.com/dify-6c0370d8-docs-agent-app-service-api/FlfPVUsZ5mgKH0FL/images/use-dify/knowledge/authorize-data-06.png?fit=max&auto=format&n=FlfPVUsZ5mgKH0FL&q=85&s=540521e705961400ae739f57f7089ad9" alt="API Key 配置完成" width="1328" height="256" data-path="images/use-dify/knowledge/authorize-data-06.png" />
</Frame>

### OAuth 授权

OAuth 是一种开放标准的授权协议，允许用户在不暴露密码的情况下，授权第三方应用访问其在特定服务提供商上的资源。Dify 提供两种 OAuth 授权配置方式：默认配置和自定义配置。

#### 授权流程

1. 在数据源配置界面，选择对应的数据源，点击右侧的 **配置**，选择 **添加 OAuth**。

   <Frame>
     <img src="https://mintcdn.com/dify-6c0370d8-docs-agent-app-service-api/FlfPVUsZ5mgKH0FL/images/use-dify/knowledge/authorize-data-07.png?fit=max&auto=format&n=FlfPVUsZ5mgKH0FL&q=85&s=cb4a2fcec234a532cca81437df42ce2d" alt="添加 OAuth" width="1280" height="305" data-path="images/use-dify/knowledge/authorize-data-07.png" />
   </Frame>

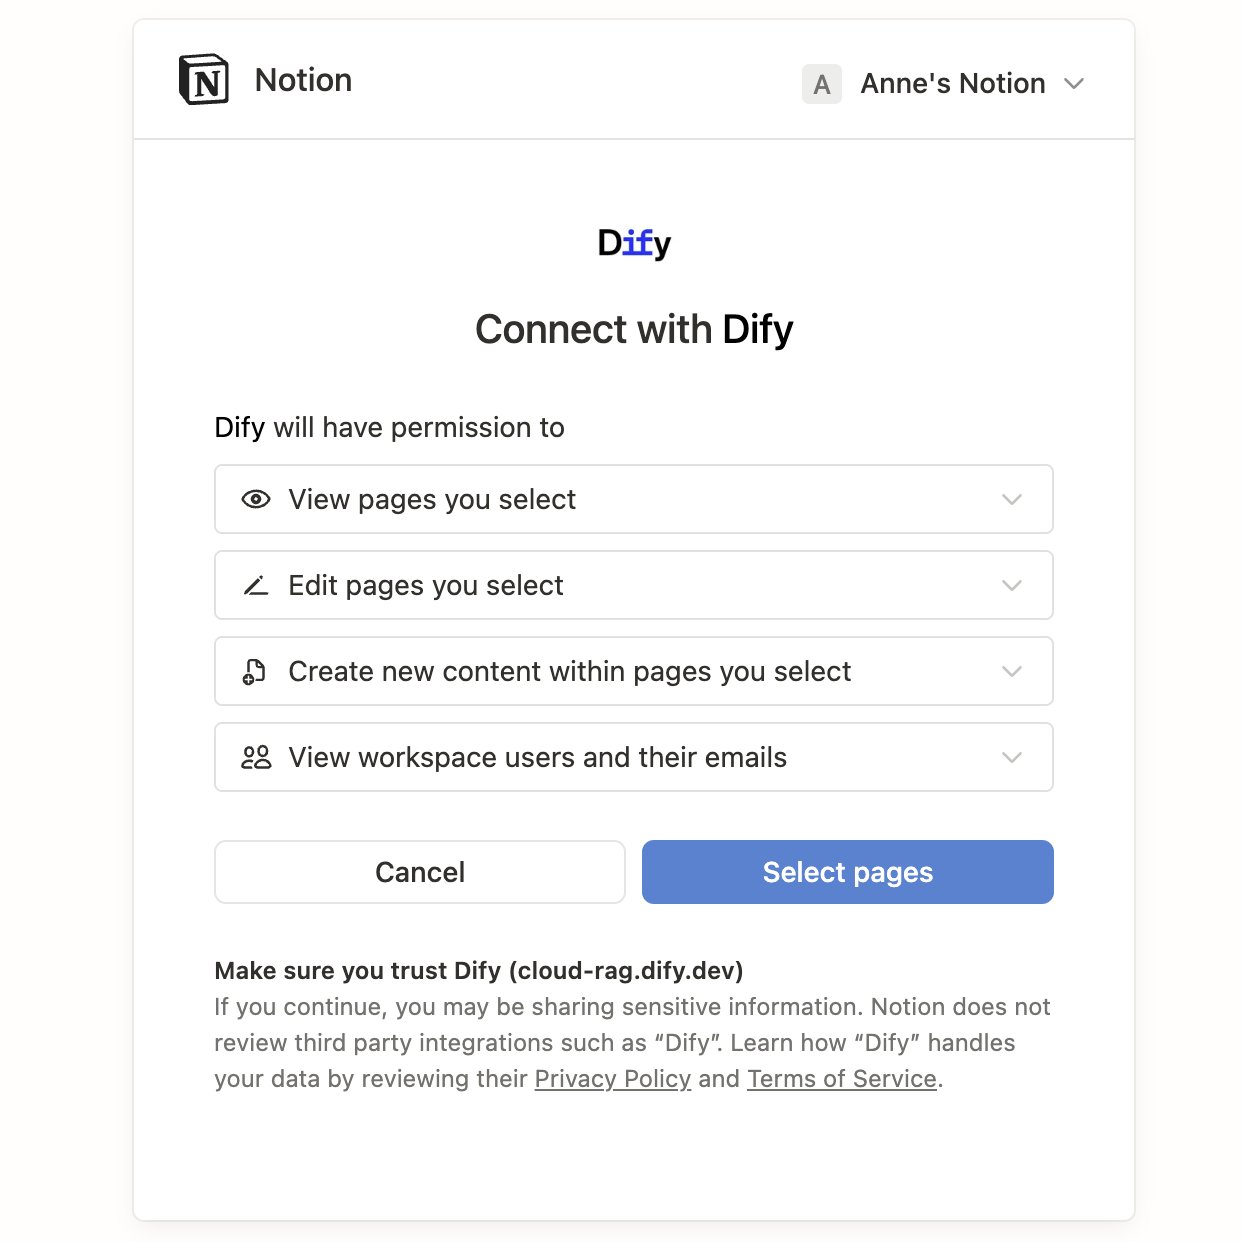
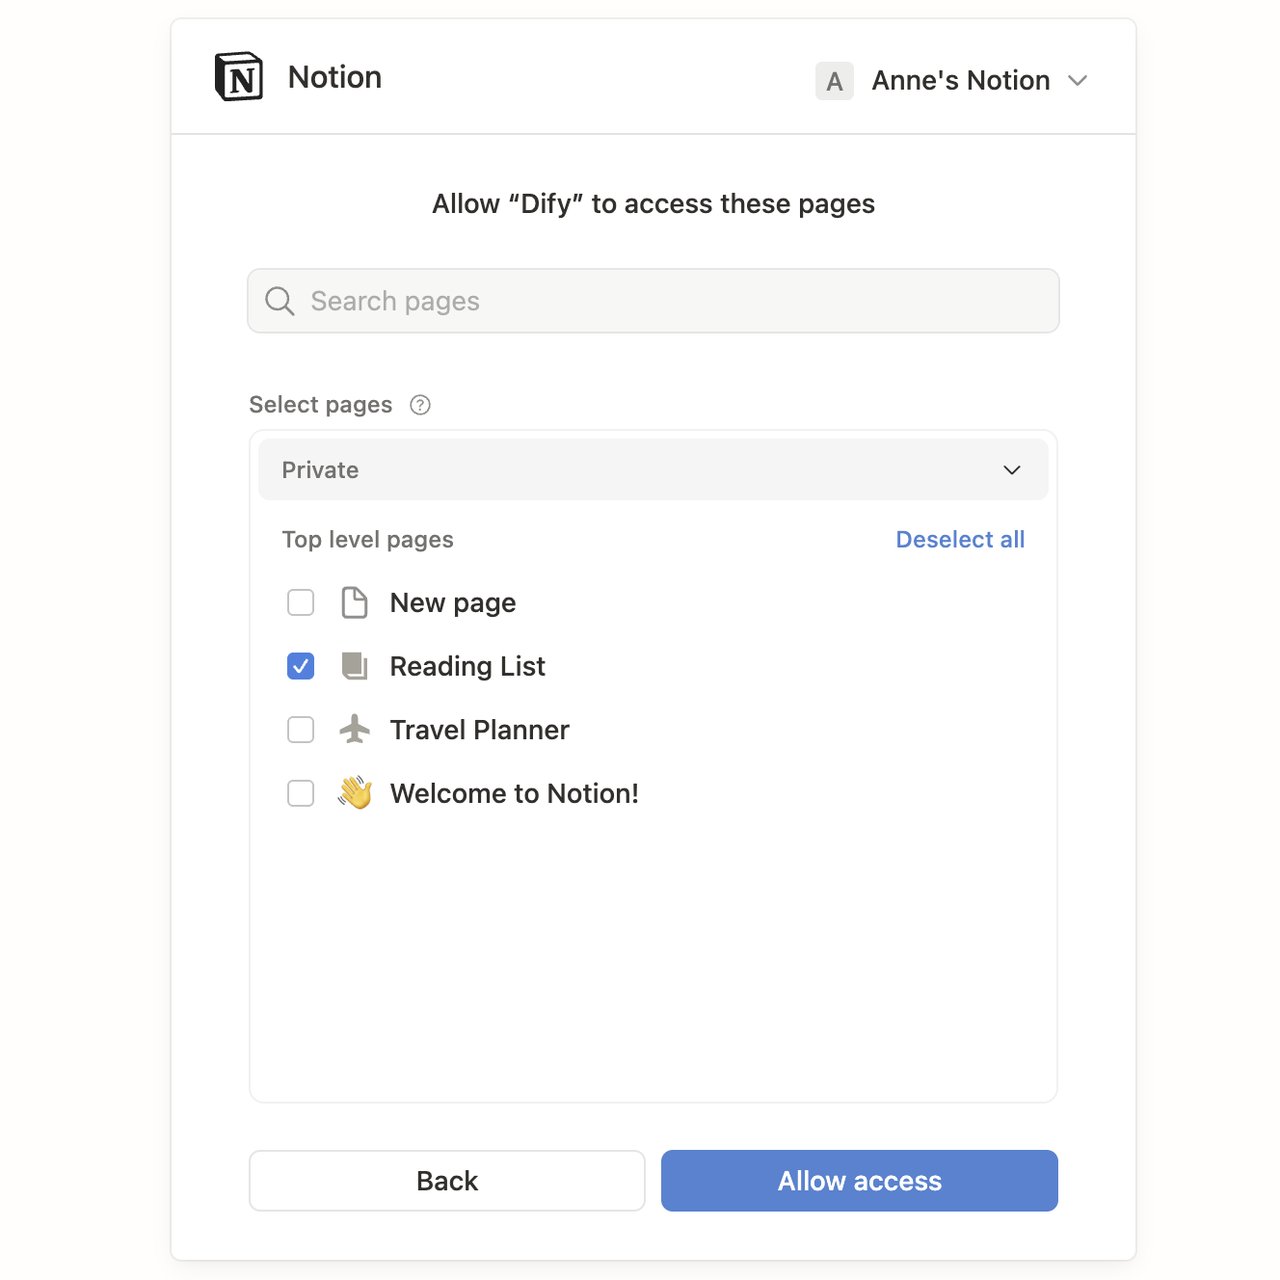
2. 在授权页面中查看并确认权限范围后，点击 **允许访问**。

   <div style={{display: 'flex', flexWrap: 'wrap', gap: '30px'}}>
     <div style={{flex: 1, minWidth: '300px'}}>
       <Frame>
         <img src="https://mintcdn.com/dify-6c0370d8-docs-agent-app-service-api/FlfPVUsZ5mgKH0FL/images/use-dify/knowledge/authorize-data-08.png?fit=max&auto=format&n=FlfPVUsZ5mgKH0FL&q=85&s=99f18f16f3a7e8d550505e5f82f37c8f" alt="OAuth权限确认" width="1242" height="1242" data-path="images/use-dify/knowledge/authorize-data-08.png" />
       </Frame>
     </div>

     <div style={{flex: 1, minWidth: '300px'}}>
       <Frame>
         <img src="https://mintcdn.com/dify-6c0370d8-docs-agent-app-service-api/FlfPVUsZ5mgKH0FL/images/use-dify/knowledge/authorize-data-09.png?fit=max&auto=format&n=FlfPVUsZ5mgKH0FL&q=85&s=e68017621867361766428a8fc06ce7da" alt="允许访问" width="1280" height="1280" data-path="images/use-dify/knowledge/authorize-data-09.png" />
       </Frame>
     </div>
   </div>

#### OAuth 客户端设置

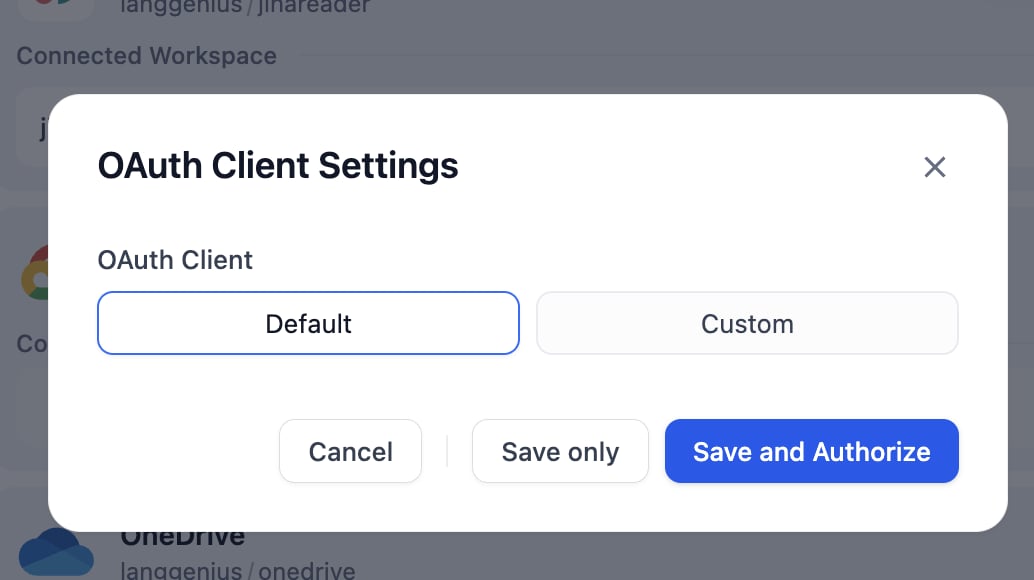
Dify 提供默认和自定义两种 OAuth 客户端配置方式。
<Frame>
  <img src="https://mintcdn.com/dify-6c0370d8-docs-agent-app-service-api/FlfPVUsZ5mgKH0FL/images/use-dify/knowledge/authorize-data-10.png?fit=max&auto=format&n=FlfPVUsZ5mgKH0FL&q=85&s=765217c484397b309b951776b8b4f45b" alt="OAuth 客户端设置" width="1034" height="580" data-path="images/use-dify/knowledge/authorize-data-10.png" />
</Frame>

<Tabs>
  <Tab title="默认">
    默认客户端使用 Dify 预先配置并维护的 OAuth 参数，无需任何额外设置，即可一键添加凭据。
  </Tab>

  <Tab title="自定义">
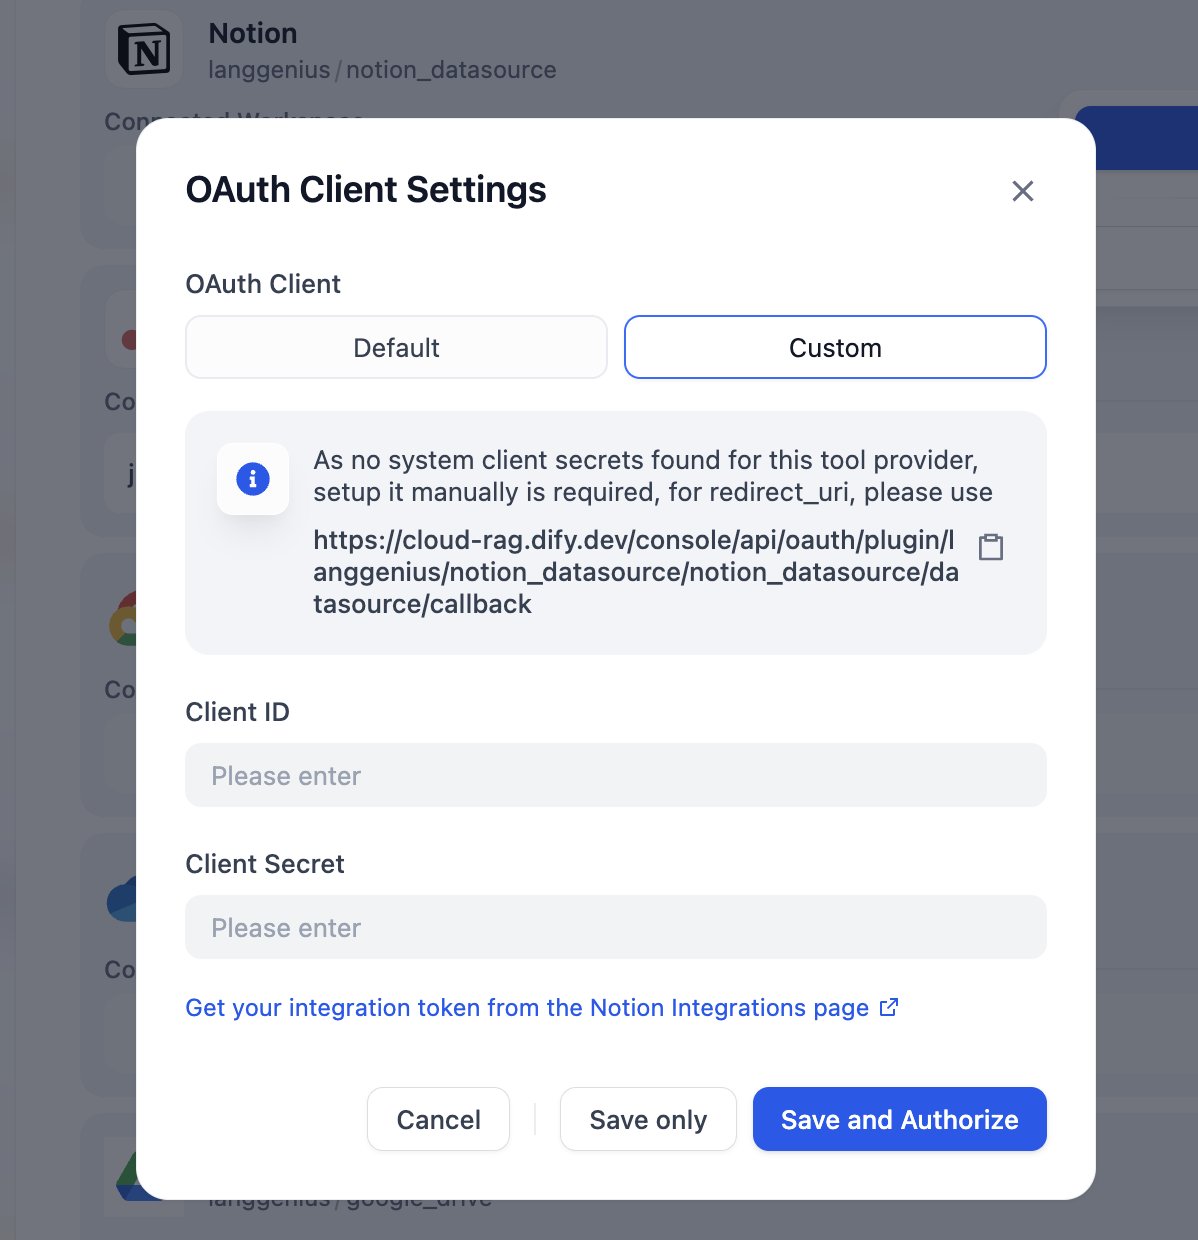
    自定义客户端允许你在第三方平台注册自己的 OAuth 应用并填入其参数。适用于没有默认客户端的数据源，或你有特定安全、合规要求的场景。

    **授权流程**

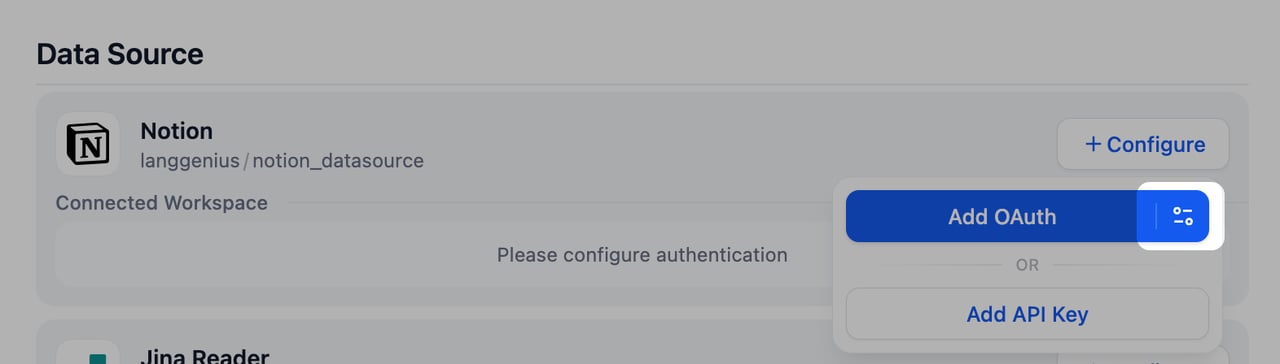
    1. 在数据源配置界面，选择对应的数据源，点击右侧的 **配置**，选择 **添加 OAuth** 右侧的 **设置图标**，进入 OAuth 客户端设置。

           <Frame>
             <img src="https://mintcdn.com/dify-6c0370d8-docs-agent-app-service-api/FlfPVUsZ5mgKH0FL/images/use-dify/knowledge/authorize-data-11.png?fit=max&auto=format&n=FlfPVUsZ5mgKH0FL&q=85&s=6d2ab3b30b5b98c0dbea1e5050badfa4" alt="自定义 OAuth 设置" width="1280" height="364" data-path="images/use-dify/knowledge/authorize-data-11.png" />
           </Frame>

    2. 点击 **自定义**，输入 **Client ID** 和 **Client Secret**。点击 **保存并授权**完成 OAuth 授权流程。
           <Frame>
             <img src="https://mintcdn.com/dify-6c0370d8-docs-agent-app-service-api/FlfPVUsZ5mgKH0FL/images/use-dify/knowledge/authorize-data-12.png?fit=max&auto=format&n=FlfPVUsZ5mgKH0FL&q=85&s=3c1da40e9913a57da92fa7b21c6b4e49" alt="自定义 OAuth 配置" width="1198" height="1240" data-path="images/use-dify/knowledge/authorize-data-12.png" />
           </Frame>
  </Tab>
</Tabs>